工作中需要在指定目录下按照正则表达式查找文件(存在多级目录结构),然后进行备份或者清理。
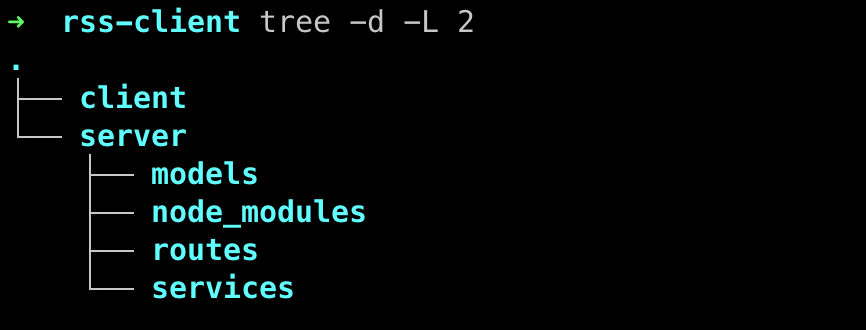
比如说Centos7中文件目录结构如下:
-
当前目录:/home/devops/mysqlbackup
-
查找文件:/home/devops/mysqlbackup/20250729/backup_20250729_021002.tgz,路径和文件名中的20250729和021002可以是任意数字
预期结果如下:
/home/devops/mysqlbackup/20250722/backup_20250722_102952.tgz
/home/devops/mysqlbackup/20250729/backup_20250729_021002.tgz
/home/devops/mysqlbackup/20250730/backup_20250730_021001.tgz
二、方案
万事不决先问AI。提示词如下
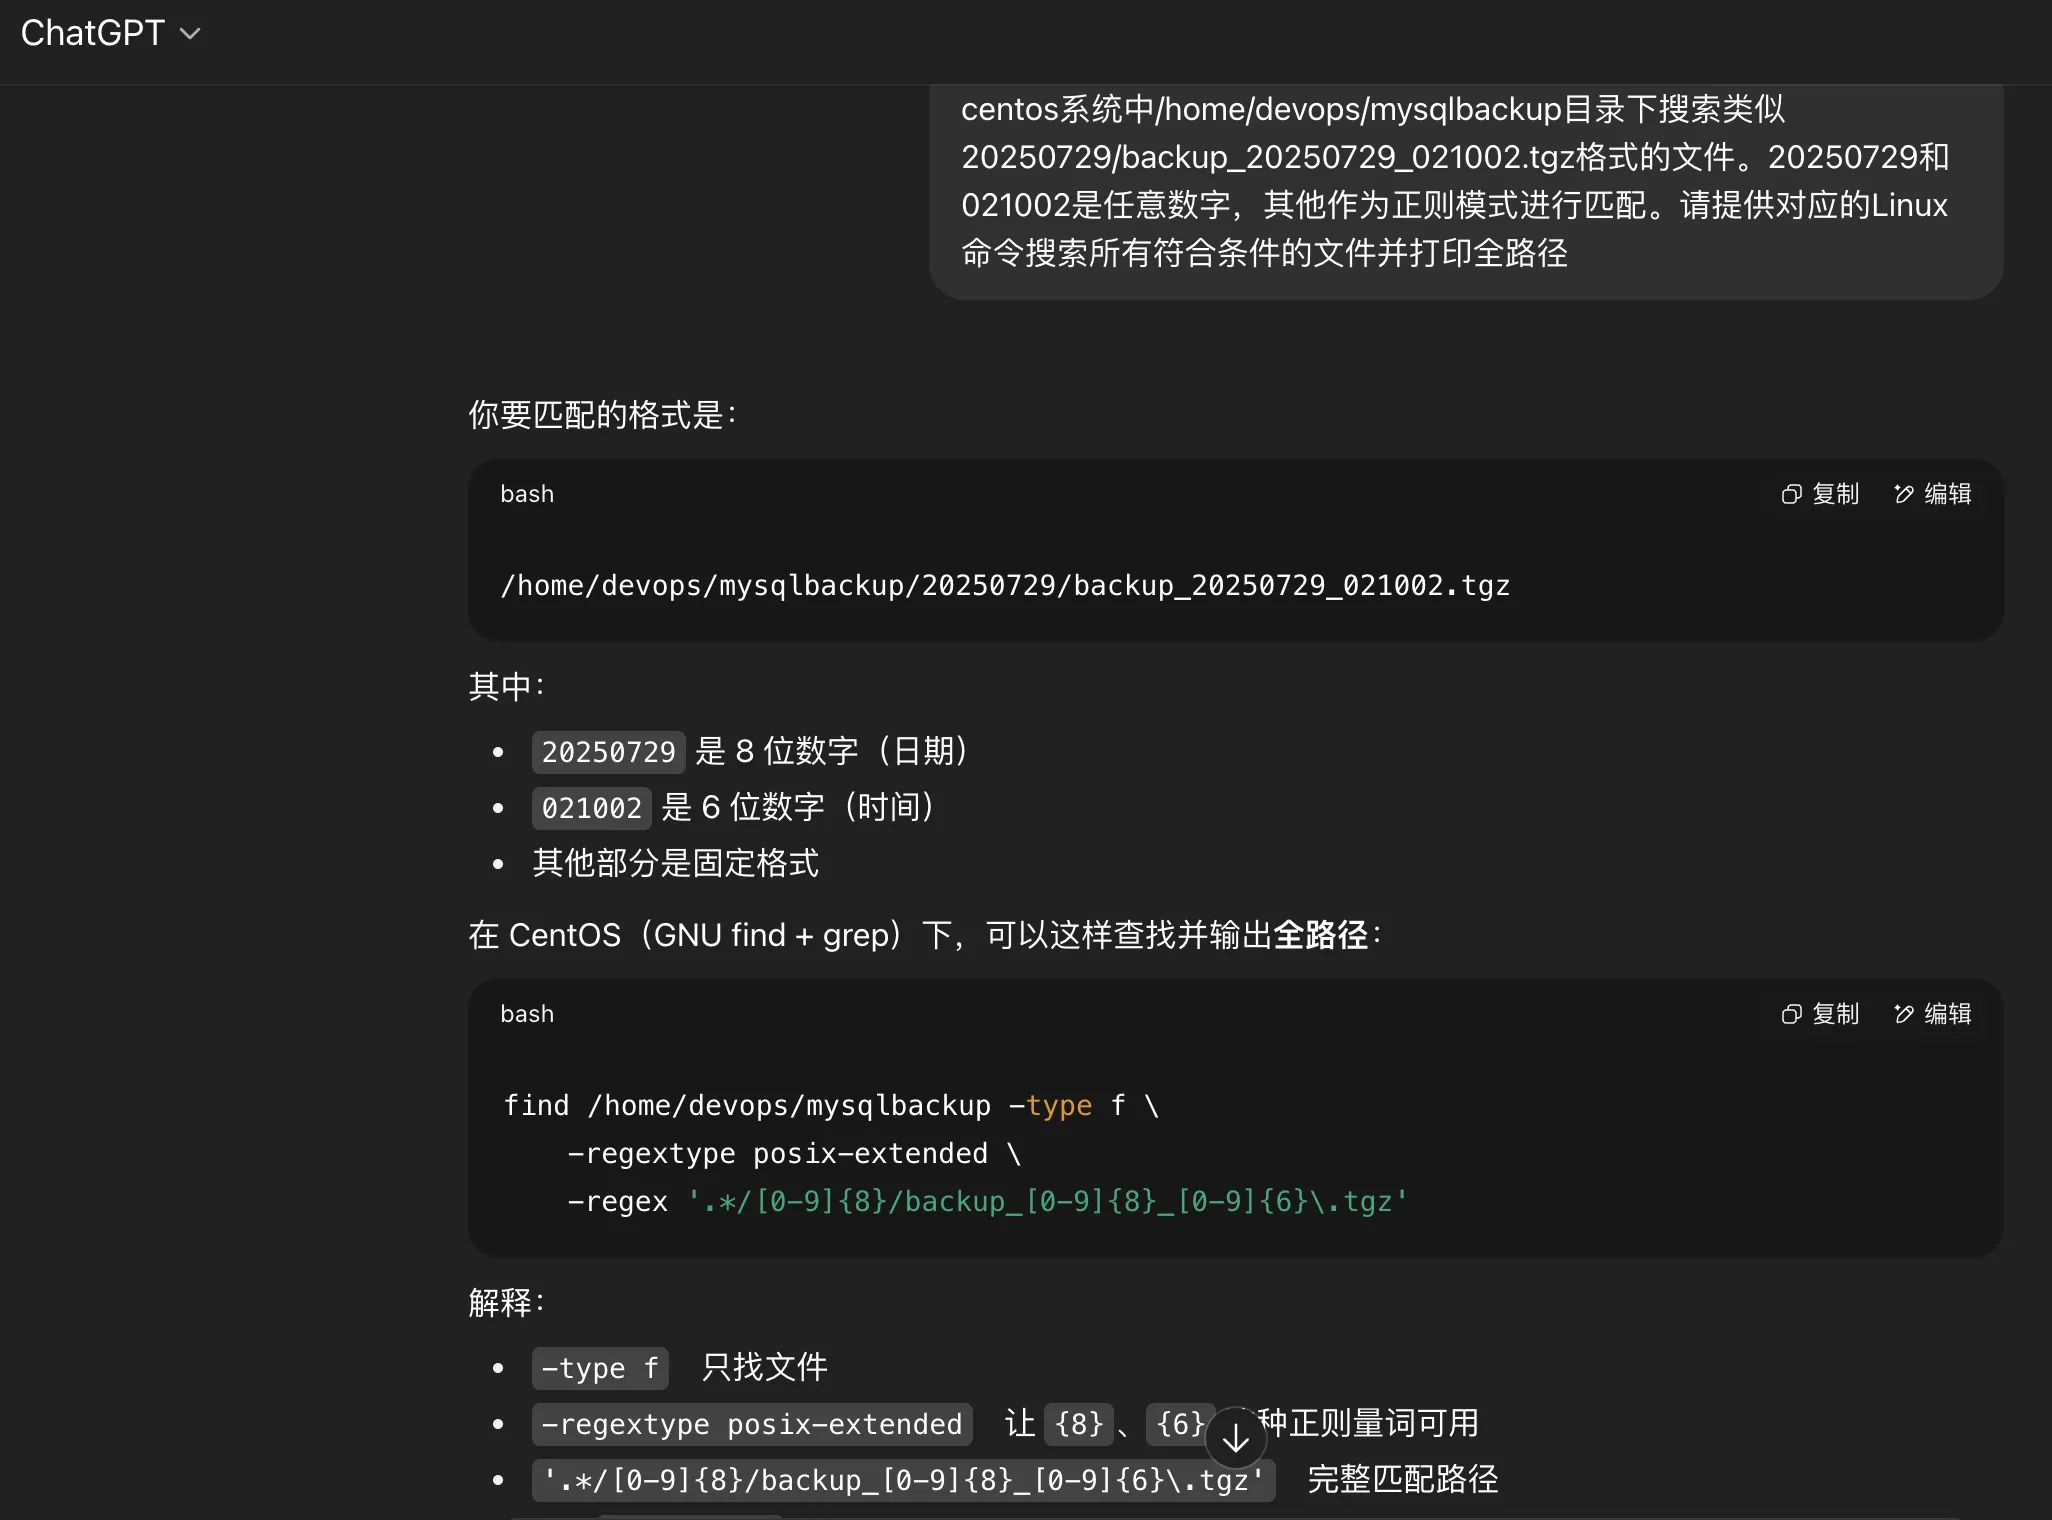
centos系统中/home/devops/mysqlbackup目录下搜索类似20250729/backup_20250729_021002.tgz格式的文件。20250729和021002是任意数字,其他作为正则模式进行匹配。请提供对应的Linux命令搜索所有符合条件的文件并打印全路径。
ChatGPT和Gemini给出的答复分别如下:
ChatGPT 方案 - 结果不符合预期
find /home/devops/mysqlbackup -type f -regextype posix-extended -regex '.*/[0-9]{8}/backup_[0-9]{8}_[0-9]{6}\.tgz'
Gemini 方案 - 结果符合预期
# 方法一使用find + grep
find /home/devops/mysqlbackup/ -type f | grep -E "/[0-9]{8}/backup_[0-9]{8}_[0-9]{6}\.tgz$"

# 方法二使用find
find /home/devops/mysqlbackup/ -type f -path "*/[0-9][0-9][0-9][0-9][0-9][0-9][0-9][0-9]/backup_[0-9][0-9][0-9][0-9][0-9][0-9][0-9][0-9]_[0-9][0-9][0-9][0-9][0-9][0-9].tgz"
系统版本如下:
cat /etc/redhat-release
CentOS Linux release 7.8.2003 (Core)
2.1 问题分析
复盘AI Prompt对话过程中遇到的几个问题。
AI首先会建议采用find+regex的方式。regex必须采用全路径正则匹配(第一个坑)。
# 方式一
find /home/devops/mysqlbackup -type f -regex "/home/devops/mysqlbackup/\d{8}/backup_\d{8}_\d{6}\.tgz"

# 方式二
cd /home/devops/mysqlbackup
find ./ -type f -regex ".*/[0-9]*/backup_[0-9]*_[0-9]*\.tgz$"
find 的起始路径不同,正则表达式也会不一样。如果不确定的话先执行一下find看一下搜索结果。比如下面:
cd /home/devops/mysqlbackup/
[root@xxx mysqlbackup]# find ./ -type f
./20250729/backup_20250729_021002.tgz

find /home/devops/mysqlbackup/ -type f
/home/devops/mysqlbackup/20250816/backup_20250816_021001.tgz
然而上面两种方式都不能搜索到预期的问题。第二个坑:regex不支持\d{m}这种正则匹配方式。关于GNU正则有BRE(Basic Regular Expressions)和ERE(Extended Regular Expressions)之分,find命令默认支持的是BRE.
The find command in CentOS (and most Linux distributions) by default uses POSIX Basic Regular Expressions (BRE) or Extended Regular Expressions (ERE) depending on the -regextype option. The \d metacharacter and {m} repetition quantifier are features of Perl Compatible Regular Expressions (PCRE), which are not natively supported by find's default regex engines.
解决方法是参数增加-regextype posix-extended 或者-regextype posix-egrep 支持ERE扩展正则。不过开启ERE后{m}可以了,\d仍然不支持,需要修改为[0-9]这种方式来代替。
# 正则准确匹配起始路径
find /home/devops/mysqlbackup -type f -regextype posix-egrep -regex "/home/devops/mysqlbackup/[0-9]{8}/backup_[0-9]{8}_[0-9]
{6}\.tgz"

# 正则通配符匹配起始路径
find /home/devops/mysqlbackup -type f -regextype posix-egrep -regex ".*/[0-9]{8}/backup_[0-9]{8}_[0-9]{6}\.tgz"
不幸的是还是匹配不到预期的文件。这里需要提到的是第三个坑:/home/devops/mysqlbackup是一个软链,链接到数据盘另外的目录,find命令中查找条件是-type f找文件(不包括链接文件),不会自动解析链接文件对应的真实目录。除非在软链名后面加/,相当于告诉find进入符号链接对应的目录进行查找。
# /home/devops/mysqlbackup是链接文件
ls -ld /home/devops/mysqlbackup
lrwxrwxrwx 1 devops devops 19 Jan 26  2024 /home/devops/mysqlbackup -> /data/mysqlbackup/
# 正则准确匹配起始路径,注意mysqlbackup链接文件结尾加了/
find /home/devops/mysqlbackup/ -type f -regextype posix-egrep -regex "/home/devops/mysqlbackup/[0-9]{8}/backup_[0-9]{8}_[0-9]{6}\.tgz"

# 正则通配符匹配起始路径,注意mysqlbackup链接文件结尾加了/
find /home/devops/mysqlbackup/ -type f -regextype posix-egrep -regex ".*/[0-9]{8}/backup_[0-9]{8}_[0-9]{6}\.tgz"
问题解决。
三、结论
- 推荐方案 find + regex
find /home/devops/mysqlbackup/ -type f -regextype posix-egrep -regex "/home/devops/mysqlbackup/[0-9]{8}/backup_[0-9
]{8}_[0-9]{6}\.tgz$"
find + grep方案也可以。不过grep中正则不要求全路径匹配。文中提到的扩展正则和符号链接要求相同。
find /home/devops/mysqlbackup/ -type f | grep -E "/[0-9]{8}/backup_[0-9]{8}_[0-9]{6}\.tgz$"
-
AI很强赋能程序员,代替了搜索方便了代码生成。但是特定专业的问题,特别是坑多的,还是需要合理的prompt,否则AI给你的都是车轱辘话,往沟里带。
-
Gemini多次prompt提示后给出了能用的方案,ChatGPT没有给出可用的方案,与prompt提示次数有关。不能作为Gemini和ChatGPT孰优孰劣的依据